This is how you build your vertical farm with a CC container
The romantic images are firmly anchored in most minds: the lettuce comes from the earth, is sun-kissed, harvested by hand and bought at the farmers' market. But nothing there, nowadays most of the plants that end up on our table come from high-tech greenhouses and are often not grown in soil, but on an inorganic medium. Watering is no longer done manually with the good old watering can, but is automated using a sophisticated irrigation system.
Many people find this idea unnatural and even frightening. But these hydroponically grown plants are in no way inferior to conventionally grown fruits and vegetables, quite the opposite. Their cultivation is more environmentally friendly, more resource-efficient, the plants can be grown without pesticides or herbicides, the cultivation is more productive and the plants require less care. In combination with vertical gardening, cultivation is also much more space-saving. This will ensure food security for a growing world population.
Growing at home is even more environmentally friendly. This eliminates transport routes and saves money. A hydroponic system is easy to build at home. Even city dwellers and people without a garden can achieve great things in a small space. With the help of an LED grow lamp, even dark corners or basement rooms can become potential greenhouses. The possibilities are endless.
Now follows step-by-step instructions for setting up a simple hydroponic system.


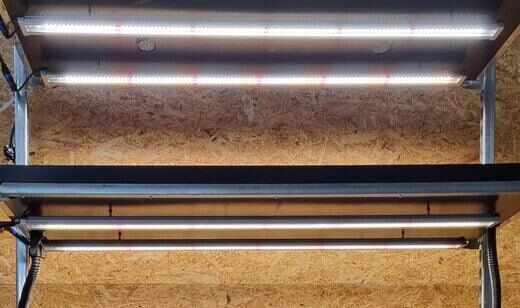
Install LED plant lights

Drill four 5mm holes for the LED plant lights in each board of the CC container.

Three M5 nuts ensure a firm hold of the LED light.

Into the aluminum profile on the top of the LED light "Line" The M5 nut can be easily inserted at the end of the screw.

Now the other nuts must be tightened so that the LED plant light is properly fixed. The lights are connected to the drivers/power supplies via Plug&Play.

Install inlet and overflow for water tubs

Place the water pan on a board of the CC container.

Mark the cutout with a pen.

Drill the inlet and inlet with a 30mm (inlet) and 35mm (overflow) milling drill.

Insert the inlet and overflow and screw it tight.


The overflow serves as additional protection should the pump run for too long and cause the tub to overflow. If the timer for the pump is programmed correctly, the overflow is not used because the water flows back through the inlet as soon as the pump switches off.

Tip: Briefly place the hose to be connected in hot water and press it very firmly and gently turning it onto the inlet/outlet connection.
Dimming LED plant lights

The dimmer is connected to the driver (power supply). For this purpose, there is a dimming cable on the driver with the wires Dim+, Dim- and Vprg for the dimmer shown. In the event of a power failure, the function last used is saved and activated automatically when the power returns. Alternatively, a simple manual DC 0/1-10V 40mA dimmer can be used. You can easily control the light and the irrigation pump using two timers.
Everything else
Place the water tank on the lowest level. Lead the inlet and overflow lines into the water tank and connect the inlet to the pond pump in the water tank. Add the required amount of hydroponic fertilizer to the water tank. Now put the irrigation fleece in the water trays so that there is no waterlogging and you can get started. You can find a fully assembled vertical CC container farm here as well as all the necessary accessories to build yourself:

